Edible Gifts for the holidays are both thoughtful & light on the pocket book. Its a gift designed from the heart that finds its way straight to the belly of a loved one. When you put thought, time & creativity into your holiday gifts, rather than spending more than you can afford, the gift giving is that much more enjoyable for both the one giving & the one receiving.
These days I find that I know quite a few people who truly enjoy tea, including myself which honestly I thought I’d never say. My grandmother always drinks tea and and as a young girl I never understood why. To me it was nothing but watered down flavor, making it that much more perplexing as to why people, including my own grandmother enjoyed it. However, as I’ve grown older I’ve learned to savor a warm cup of tea before bed. I enjoy it when I’m feeling sick or stressed, and simply just because. Over the years it would seem that the flavors I felt were once missing from tea have actually blossomed, but I’m willing to bet its merely that my tastes have evolved.
For the holidays, and all my tea loving friends, I decided to try baking these adorable tea bag cookies I came across recently. For those who don’t know me well, I’m not much of a successful baker. Its not because I don’t LOVE sweets, cookies, or pies, its simply due to the science of baking and my lack of “coloring between the lines.”
As I’ve begun to explore the culinary world I’ve really enjoyed experimenting with flavors, textures and combinations; adding a “splash” here or a “pinch” there and often using a recipe as a guidebook rather than rules that need to be followed. With baking, a recipe is specific because it has to be. Its a creative form of chemistry in that the measurement of substances in a mixture are precise and exact; if you guess, quite often it will result in a different or more extreme reaction than you were expecting. In the same way, a cookie will turn out flat & thin if your ratios are off, and a cake will be dry & crumbly for the very same reason. When you stick to the recipe though and your mixture is precise, boy oh boy! those treats are simply divine.
With my holiday spirit beaming this December, I decided to give baking my undivided attention and truly focus on the recipe this time. Of course as is my nature i’ll always leave room for a little innovation & creativity, but I’ve now realized my baking mistakes and learned that measuring precision is key. What once had frustrated me now became a personal challenge. This Holiday I’m accepting the baking challenge and as a result making delicious treats and edible gifts for the loved ones on my list!
Preheat Oven: 350 Degrees
Cook Time: 8-10 Minutes
ingredients:
2 cups all-purpose flour
1/4 teaspoon salt
1 cup (2 sticks) unsalted butter, room temperature
1/2 cup powdered (confectioners or icing) sugar
1 teaspoon pure vanilla extract
2 teaspoons herbs de provence with lavender
optional chocolate coating:
6 ounces of dark chocolate chips
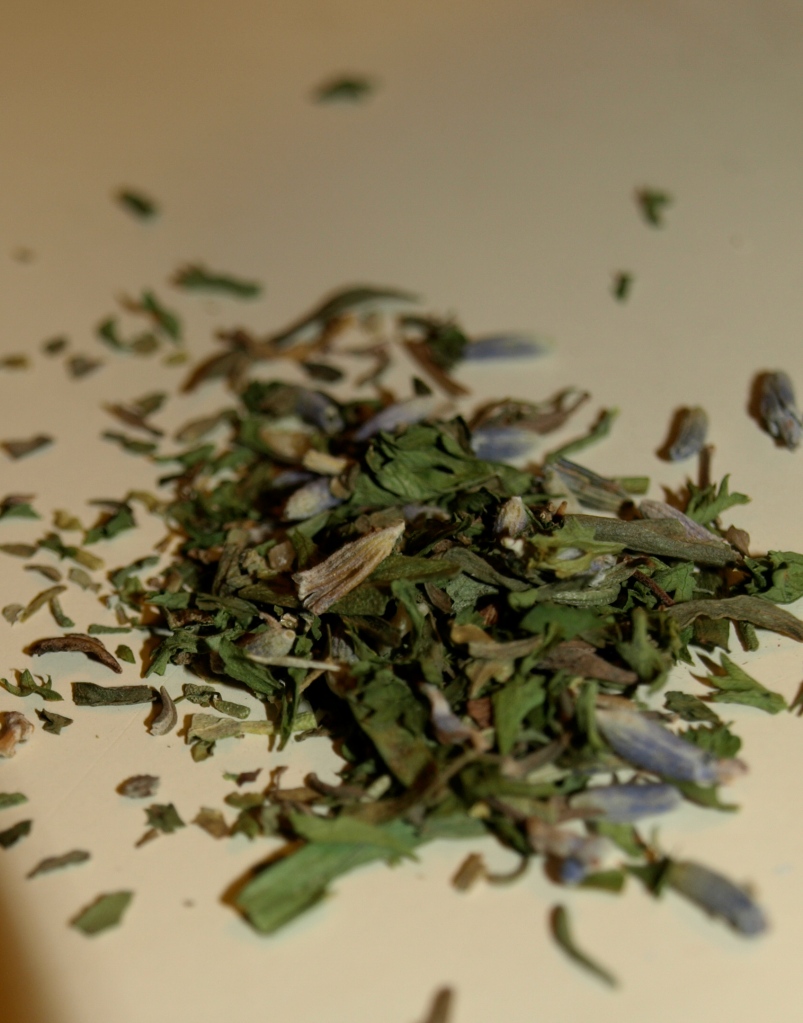
These shortbread cookies were based off of a recipe from joyofbaking.com but I gave them a little twist by adding the rosemary lavender combination of the herbs de provence. The first step is to combine the flour and salt in a small bowl and set aside. Next, powdered sugar, room temperature butter, pure vanilla, and herbs de provence are folded together in a bowl. If you have a stand-up mixer, hand mixer or spoon you can do this, but the key here is the temperature of the butter.
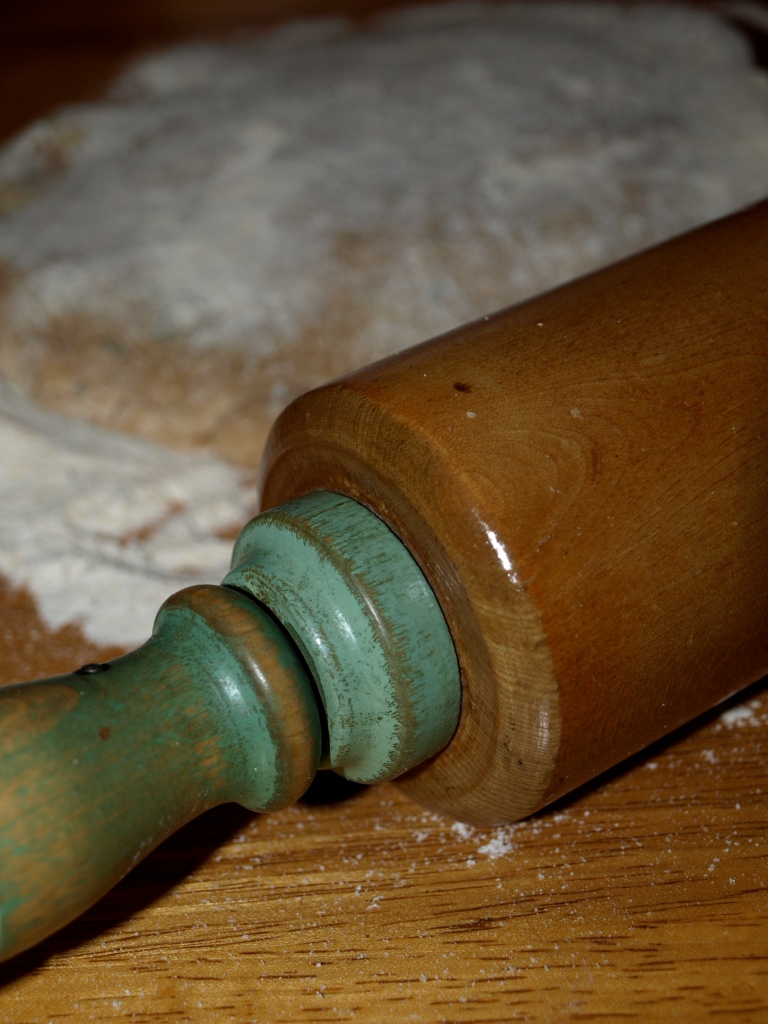
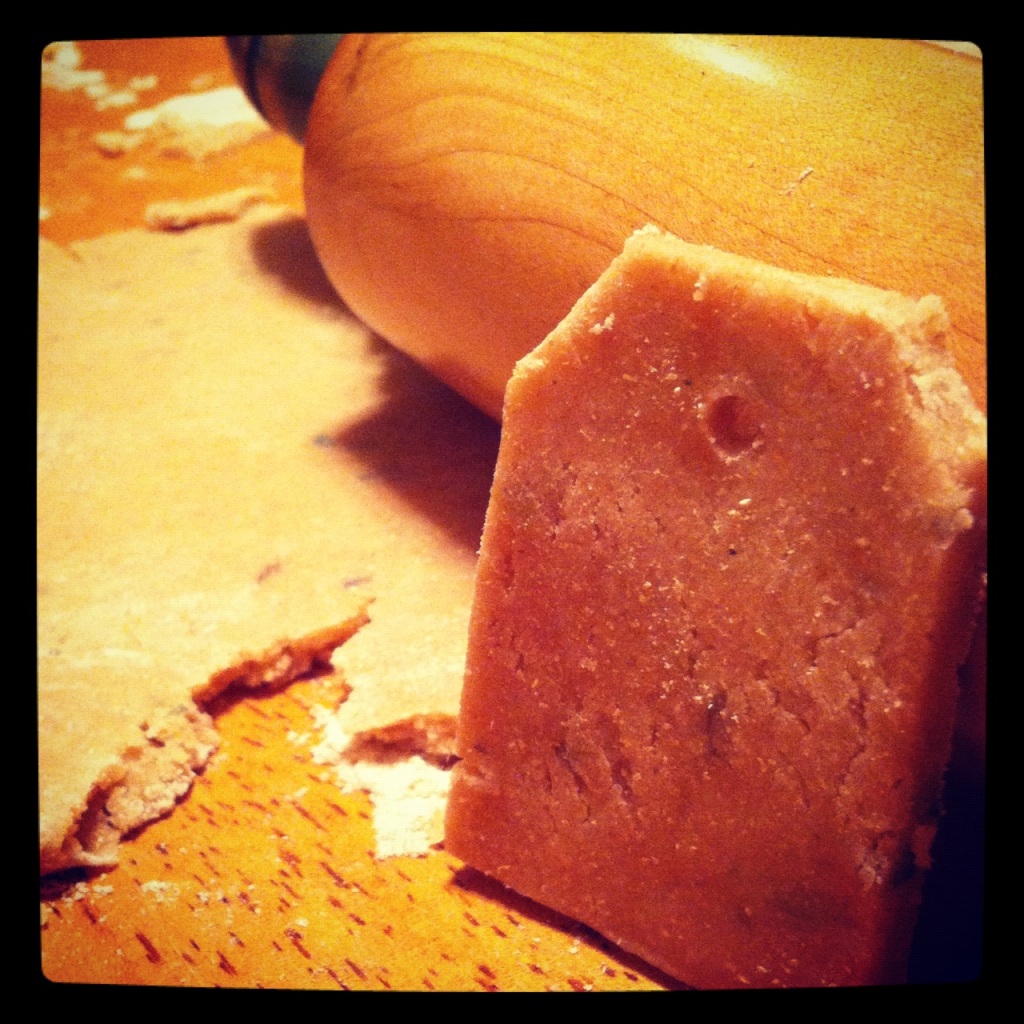
Now we add the flour & salt to the mixture, then cover and place in the refrigerator for 1 hour. When we roll out the dough its important than its neither too cold nor too warm, and this cooling process will help make it easier for you in the long run. With little patience to wait an hour, I simply let my dough cool over night, and then took it out the next day, softening in room temperature for about 10 minutes.
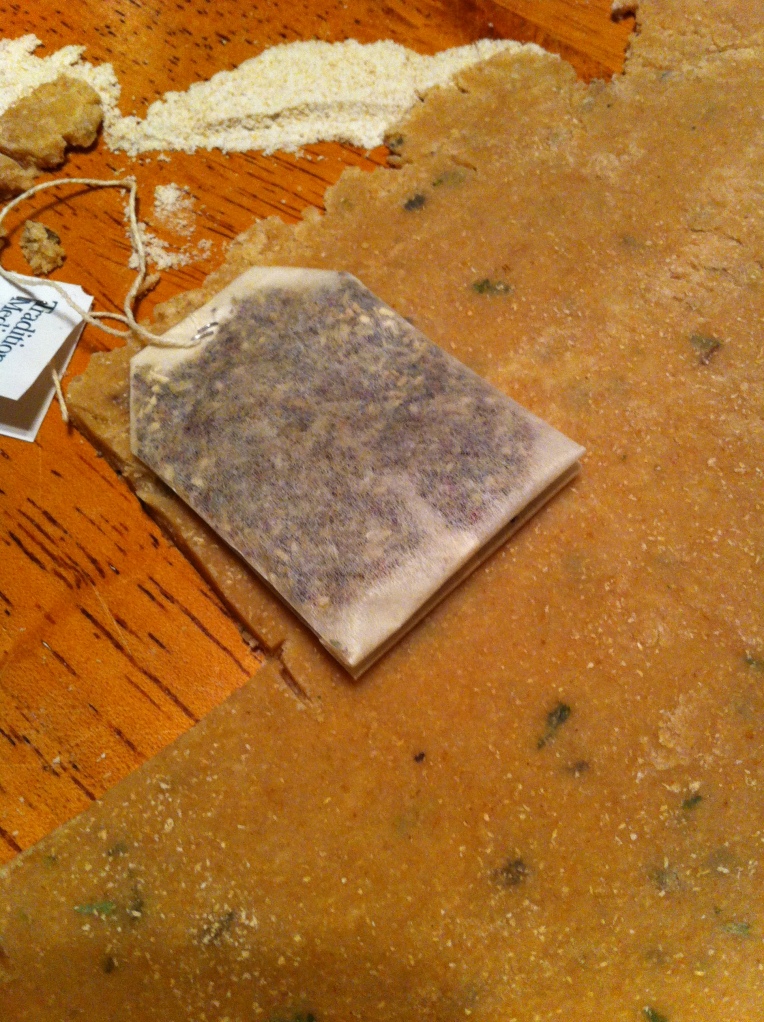
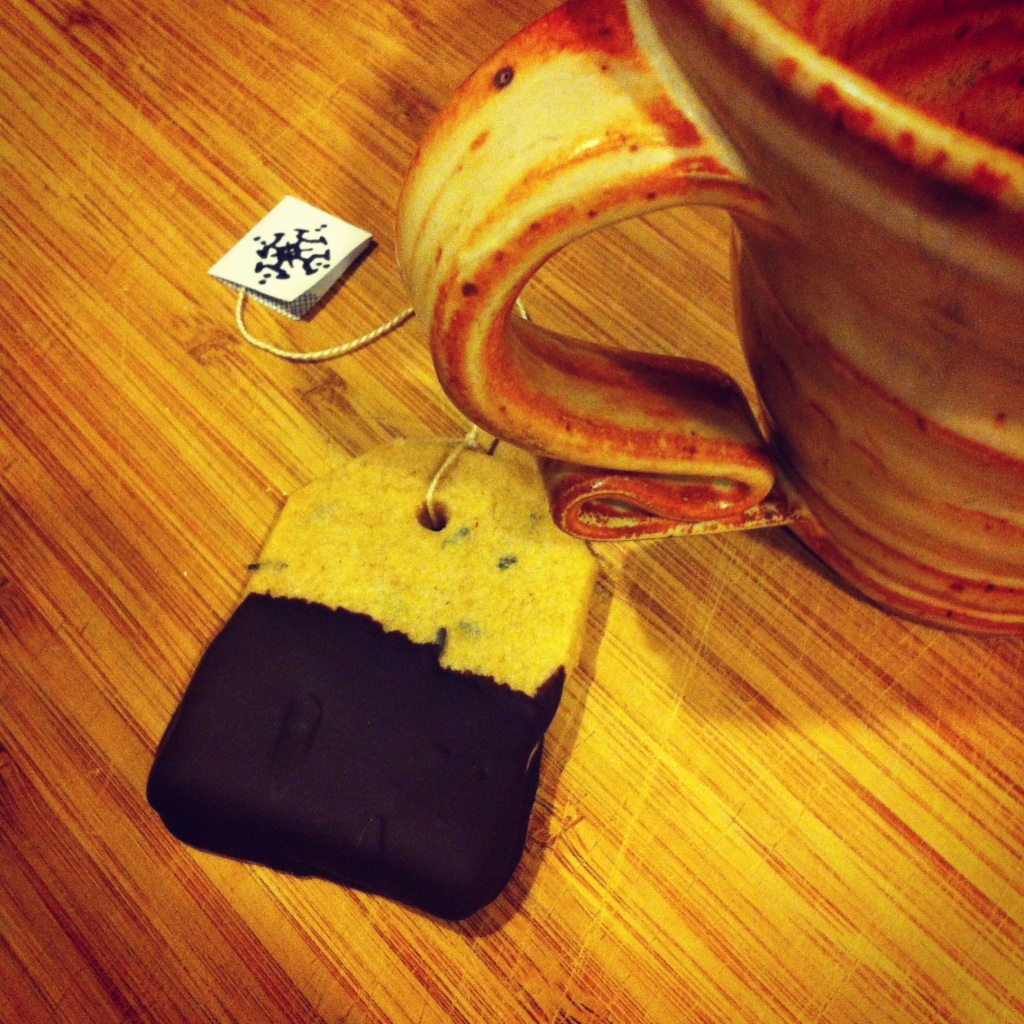
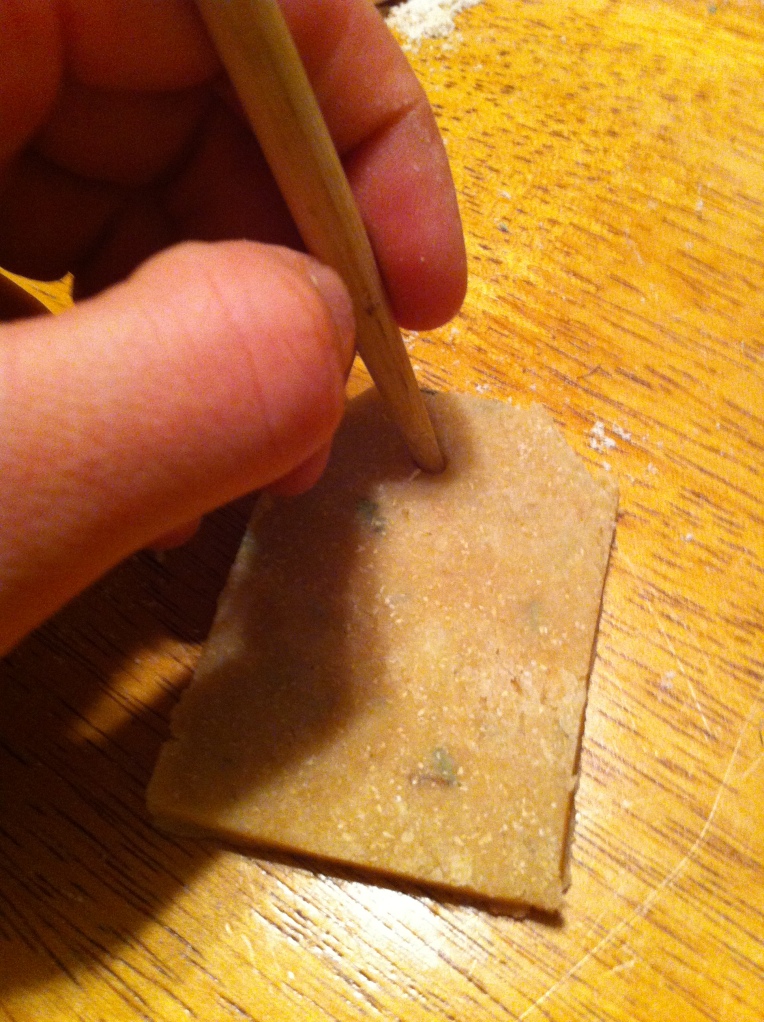
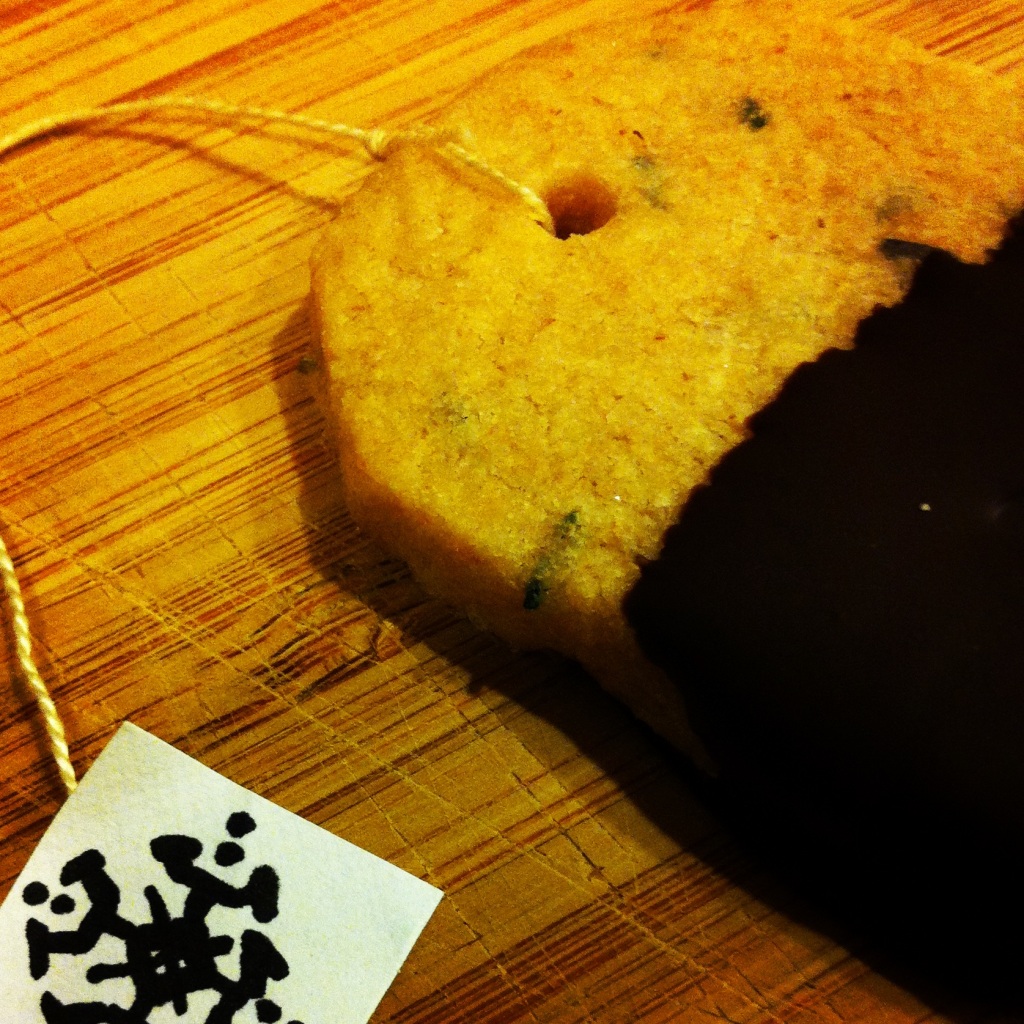
With flour lightly tossed on my countertop, I placed the dough on top and rolled it out with a rolling pin to about 1/4 inch thickness. A tea bag helped create the perfect shape and I simply cut around it, making a hole near the top with a chopstick large enough to easily get a string thru. You could also use a straw, which would create the perfect shape, but I didn’t have one so I improvised. As a side note: Its important not to place the hole too close to the top, because the weight of the cookie could easily break when your “dunking” the finished product.
By placing parchment paper on the pan, you’ll ensure the cookies wont stick. So on top of the parchment lined baking pan, place your tea bag cookies and pop them into the oven. Once they are a very light brown its time to take them out, usually about 8-10 minutes. I let my cookies cool a bit on the pan, because my first attempt to remove one resulted in a cookie snapped in half..of course I ate that one though, so it really wasn’t that heartbreaking.
For finishing touches, you can string a thin but durable string thru, add a clever design to the paper on the end of the string, or even add a little dark chocolate. I kept a few cookies plain to add a little variety to my edible gift, but I couldn’t pass on dark chocolate so I did a few of those as well. To add the dark chocolate is really quite simple. You need a heatproof bowl to place over a pot of simmering water and you place about half of your chocolate into the bowl to let it melt. Once it has you remove the bowl from the heat, add your remaining chocolate chips and stir until it all has completely melted.

With the string already tied to my tea bag cookies, I diped the ends in the chocolate and placed them on parchment paper lining a baking pan. Once they were all dipped I placed them in the refrigerator to cool.
I’m sitting here imagining the look on my loved ones faces when they receive this edible gift, and I simply cannot wait. Of course I’ll be including the recipe with my tin of cookies as well, so my friends can always make more (the gift that keeps on giving!). Next week I’ll be sharing another gift with you all, but until then get on with your crafting & baking! A Homemade Holiday is something to celebrate!
love,
tricia